こんにちはフクシャチョーです。
アプリを作るバックエンドとしてFirebaseを使うために、Firebaseとお友達になろうとしている最中です。
そのため、この記事はFirebaseでCloudFunctionを使ってみるという最初の一歩を踏み出す人向けになっています。
Firebase-toolsインストールとログイン
node.jsはインストール済みの前提です。
npm install -g firebase-tools
Googleアカウントでログインします。
$ firebase login
Chromeが立ち上がってきますので、ログインしてください。複数アカウント持っている人は、どのアカウントでログインするか決めておきましょう。
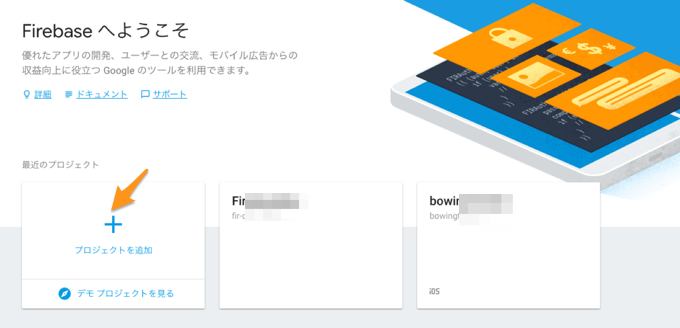
まだ、一つもプロジェクトを持っていない人は、コンソール画面で作成します
ログインしたアカウントですでに持っているプロジェクトをリストしてみます。
$ firebase list
┌───────────────┬───────────────────────┬─────────────┐
│ Name                    │ Project ID / Instance                │ Permissions          │
├───────────────┼───────────────────────┼─────────────┤
│ bowingxxxxxx            │ bowingtxxx                            │ Owner               │
├───────────────┼───────────────────────┼─────────────┤
│ Firebaxxxxx             │ fir-dexxx                             │ Owner               │
└───────────────┴───────────────────────┴─────────────┘
プロジェクトの作成
プロジェクトディレクトリを作成します。作成したディレクトリに移動し、init functionsを実行します。
mkdir myfunctions
cd myfunctions

firebase init functions
プロジェクトセットアップで、どのFirebaseプロジェクトを使うか聞かれますので、すでに作成ずみの上記のリストから選択するか、新しいプロジェクトを作るかの選択をします。
新しいプロジェクトの選択を選んだ場合は、あとでコンソールでプロジェクトを作る必要があります。
=== Project Setup

First, let's associate this project directory with a Firebase project.
You can create multiple project aliases by running firebase use --add,
but for now we'll just set up a default project.

? Select a default Firebase project for this directory: [create a new project]
CloudFunctionsをJavaScriptで記述するかTypeScriptで記述するかの選択をします。
ここではJavaScriptの選択をして、ESLintも使うようにしています。
=== Functions Setup

A functions directory will be created in your project with a Node.js
package pre-configured. Functions can be deployed with firebase deploy.

? What language would you like to use to write Cloud Functions? JavaScript
? Do you want to use ESLint to catch probable bugs and enforce style? Yes
✔  Wrote functions/package.json
✔  Wrote functions/.eslintrc.json
✔  Wrote functions/index.js
? Do you want to install dependencies with npm now? Yes
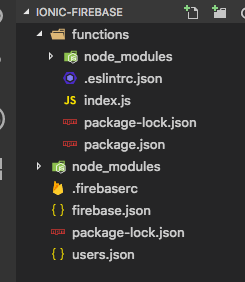
コマンドの実行が終了すると、CloudFunctionsを記述するためのプロジェクトがディレクトリ配下に展開されます。
サンプルプログラム
さて。
ここから、Firebaseの公式サイトにあるはじめに: 最初の関数の記述とデプロイをindex.jsに写経して実行しようとしたのですが、makeUppercaseエラーになったので、コードはこちらを写経してください。
functions-samples/quickstarts/uppercase at master · firebase/functions-samples
ちなみに、このgitHubにはCloudFunctionsのテンプレートが沢山用意されています。
これらを応用していけば大抵のことはできそうです。
追記:Firebase SDK for Cloud Functions のバージョン 1.0.0 では、API にいくつかの重要な変更が導入されています
makeUppercaseエラーとなった原因としては、このバージョンの差異で、それがドキュメントに反映されていなかったからかと思われます。
Firebase SDK for Cloud Functions 移行ガイド: ベータ版からバージョン 1.0 へ | Firebase
特に重要な変更点として、event.data 形式が data および context パラメータに置き換えられていることですね。
CloudFunctionの変更部分はおさえておきましょう。
デプロイ
サンプルプログラムを記述したのでデプロイしましょう。
デプロイ先のFirebaseのプロジェクトを選択します。
$ firebase use --add
? Which project do you want to add? (Use arrow keys)
❯ bowinxxxxxxx
fir-xxxxxxx
プロジェクトを選択したら、デプロイします。
$ firebase deploy --only functions

=== Deploying to 'fir-xxxxxxx'...

i  deploying functions
Running command: npm --prefix "$RESOURCE_DIR" run lint

> functions@ lint /Users/bohebohechan/Documents/gitLab/FirstFourNotes/lab/ionic/ionic-firebase/functions
> eslint .

✔  functions: Finished running predeploy script.
i  functions: ensuring necessary APIs are enabled...
✔  functions: all necessary APIs are enabled
i  functions: preparing functions directory for uploading...
i  functions: packaged functions (50.5 KB) for uploading
✔  functions: functions folder uploaded successfully
i  functions: updating function addMessage...
i  functions: updating function makeUppercase...
✔  functions[makeUppercase]: Successful update operation.
✔  functions[addMessage]: Successful update operation.

✔  Deploy complete!

Project Console: https://console.firebase.google.com/project/fir-xxxxxxx/overview
コンソールを確認します。デプロイされていますね。
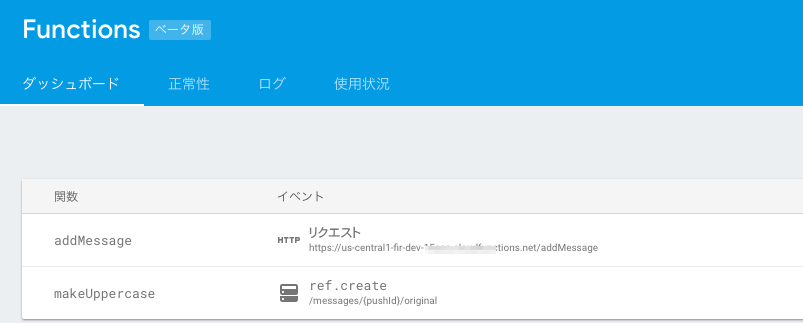
addMessageのFunctionのエントリポイントURLが表示されていますので、このエントリポイントに対して実行しましょう。
実行
https://us-central1-fir-xxxxxxxxxxxxx.cloudfunctions.net/addMessage?text=helloworld
ブラウザから実行すると、Realtime Databaseの画面が表示されて、オリジナルで送信した「helloworld」が、UpperCaseになって登録されていますね。

CloudFunctions第一歩は完了です。
めも((φ(・д・。)
デプロイしてからすぐに実行すると、まだ反映されていないのか、前のプログラムが実行されてしまったりすることがありましたので、ちょっと時間が必要なのか・・・と思いました。